

How to Program a Merlin M2000 / M2500L / M2200 Compatible Remote
Programming a compatible Merlin M2000, M2500L or M2200 duplicator remote takes about five minutes. Erase the factory code, hold the two remotes together and copy the signal across. No tools needed.
- Your original, working garage remote
- The new compatible remote with its battery fitted
- No tools required
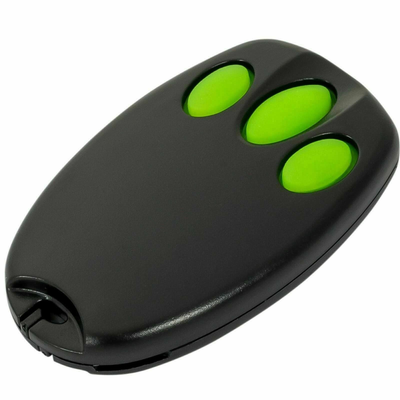
- Tavice Garage Remote Compatible with Merlin / Merlin+ C945 CM842 C940 C943 Merlin +
- [2 Pack] Tavice Garage Remote Compatible with Merlin Door Remote Key Control for Chamberlain Compatible C945 Merlin+ C945
- [3 Pack] Tavice Garage Remote Compatible with Merlin Door Remote Key Control for Chamberlain Compatible C945 Merlin+ C945
This compatible remote is a duplicator. Instead of pairing with the garage door motor, it copies the code from your existing working remote. The whole process is two short stages: erase the factory code that ships in the remote, then copy the code across from your original. No tools, no ladder and no access to the motor unit is needed.
Applies to
Compatible replacement remotes for the Merlin M2000, M2500L and M2200 garage door openers. Button markings vary between batches, so where the steps refer to the top two buttons, these may be shown as a lock and unlock symbol, buttons 1 and 2, or an up and down arrow.
Before you start
You need your original remote, and it must still open the door. If the original remote is lost or no longer works, this remote cannot learn from it.
Stage 1: erase the factory code
Every new duplicator remote ships with a placeholder code that has to be cleared before it can learn. This is steps 1 to 3 below. A successful erase is confirmed when the LED no longer lights on a button press.
Stage 2: copy the code from your original
Steps 4 to 7 put the new remote into learn mode and copy the signal across. A steadily flashing LED on the new remote means the copy has worked.
Independent programming guide for compatible replacement remotes. Merlin and model names belong to their respective owners.
Step-by-step instructions
Hold the top two buttons
Press and hold the top two buttons on the new remote at the same time and do not let go. Depending on the remote these are marked as a lock and unlock symbol, buttons 1 and 2, or an up and down arrow. After a few seconds the LED flashes and then goes out.
Press the second button three times
Keep holding the first button (lock, up or button 1). Release the second button (unlock, down or button 2) and press it three times. The LED flashes again to confirm the factory code has been erased.
Release and test
Let go of all buttons, then press any button. If the erase worked, the LED stays off. If it still lights, repeat steps 1 to 3.
Bring the two remotes together
Place the new remote and your original working remote side by side. You may need to try a few positions such as head to head or back to back until the copy takes.
Put the new remote in learn mode
Press and hold the button on the new remote that you want to operate the door. The LED flashes quickly and then goes out, which means the remote is in learn-code mode. Keep holding this button.
Send the code from the original remote
While still holding the new remote's button, press and hold the button that opens your door on the original remote. When the LED on the new remote starts flashing steadily, the code has been copied.
Test the new remote
Release all buttons and press the programmed button on the new remote. The door should respond exactly as it does to the original. Repeat steps 5 and 6 for any other buttons you want to copy.
![[2 Pack] Garage Gate Door Remote Key Control For Chamberlain Merlin C945 Merlin+C945 - Battery Mate](http://www.batterymate.co.nz/cdn/shop/products/2-pack-garage-gate-door-remote-key-control-for-chamberlain-merlin-c945-merlinc945-947762.jpg?v=1779402614&width=400)
![[3 Pack] Tavice Garage Remote Compatible with Merlin Door Remote Key Control for Chamberlain Compatible C945 Merlin+ C945 - Battery Mate](http://www.batterymate.co.nz/cdn/shop/files/3-pack-tavice-garage-remote-compatible-with-merlin-door-remote-key-control-for-chamberlain-compatible-c945-merlin-c945-806765.jpg?v=1779405031&width=400)